Before paving the wall tiles in the bathroom, it is necessary to do a waterproof project on the wall, so as to ensure that the wall tiles in the bathroom will not fall off or get damp during future use. But many owners don’t know much about the waterproofing of bathroom walls, so let’s learn together!
[Waterproof method of bathroom wall]
Bathroom waterproof method 1. Clean the ground
Don’t underestimate this simple step. In fact, cleaning the ground is actually to ensure that the ground is dry, clean and free of debris. At the same time, by the way, level the bathroom floor (that is, level it). Make sure that the thickness is uneven and the ground is cracked when you apply the first coat of waterproof paint. If the original floor tiles need to be chiseled off, mud mortar is needed to level the ground.
Bathroom waterproof method 2, bathroom waterproof height
The wall must be waterproofed, and the wall must be waterproofed before laying wall tiles. In general waterproof treatment, the wall should be waterproofed at a height of 30 cm, but for non-load-bearing light walls, the entire wall must be waterproofed, at least 60 cm high.
Bathroom waterproof method three, bathroom waterproof smear
The joints between the wall and the ground and the joints between the pipes and the ground between the upper and lower water are the places where problems are most likely to occur. Workers must be supervised to handle these corners and corners, and the waterproof coating must be applied in place.
Bathroom waterproof method four, bathroom waterproof tiles
Relay the floor tiles to make the ground waterproof. If you need to replace the original floor tiles in the bathroom, after the original floor tiles are chiseled, you must first use cement mortar to level the ground, and then do waterproof treatment, so as to avoid seepage caused by uneven thickness of the waterproof coating. leak. Before waterproofing, the ground must be cleaned.
Bathroom waterproof practice five, bathroom waterproof mulch
Try not to destroy the original waterproof layer. The newly delivered buildings are generally waterproofed on the ground. Therefore, if the original waterproof layer is not destroyed, generally no leakage will occur. The decoration team is required to make cement mulch for the upper and lower water pipes of the bathroom, and paint 10 to 20 cm of waterproof paint from the ground upwards, and then redo the ground with ester waterproofing, and add the original waterproof layer to form a composite waterproof layer to enhance waterproofing sex.
Bathroom waterproof method six, bathroom waterproof wall groove
The grooves of the inner water pipes should also be waterproofed. During the construction process, when the pipes and floor drains pass through the floor, the waterproof layer around the holes must be carefully constructed. The water pipes are buried in the wall to achieve a reasonable layout, and the laying of the water pipes should be done with grooves larger than the diameter of the pipes. The grooves are plastered and smooth, and then the grooves are painted with waterproof paint.
Bathroom waterproofing method 7. Water storage test
Tests are the sole criterion for testing truth. Therefore, the water storage test can be carried out after the waterproof layer is determined to be ready. The water at the highest point on the ground should not be lower than 2 cm, and should be kept for at least 24 hours. Check to see if there is any leakage. If there is leakage, you need to re-arrange the waterproof layer. In addition, the general test is not less than 24 hours.
[Precautions for waterproofing of bathroom walls]
Note 1: The floor tiles must be resurfaced to be waterproof. If it is necessary to replace the original floor tiles in the bathroom, after the original floor tiles are chiseled off, the ground must be leveled with cement mortar first, and then waterproofed, so as to avoid leakage of the waterproof coating due to uneven thickness. Before doing waterproofing, be sure to clean the ground, and repeatedly paint it with polyurethane waterproof paint 2 to 3 times.
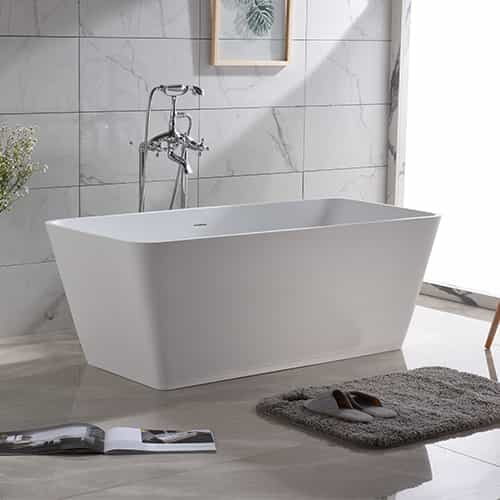
Note 2: The waterproofing of the bathing area must be in place. The waterproof of the wall adjacent to the shower position should also be 1.8 meters high. If a bathtub is used, the height of the waterproof coating on the wall adjacent to the bathtub should also be higher than the upper edge of the bathtub.
Note 3: The water pipe groove in the wall should also be waterproofed. During the construction process, when pipes, floor drains, etc. pass through the floor, the waterproof layer around the holes must be carefully constructed. The water pipes are buried in the wall to achieve a reasonable layout, and the laying of water pipes must be made with grooves larger than the diameter of the pipes. The grooves are plastered and smooth, and then polyurethane waterproof paint is applied to the grooves.
Note 4: Top moisture-proof covering treatment. The moisture in the toilet is relatively large. At present, the toilet and the bathroom are integrated in general buildings, so the toilet is often surrounded by water vapor, so the moisture-proof of the roof is very important. To make the bathroom roof waterproof, it is best to apply a layer of water glass on the roof, and then use a pvc gusset with better waterproof performance. The buckle plate can be installed on the keel, and it can also play a role in covering the pipeline.
Note 5: Use the 24-hour water storage test to check and accept the waterproof. After the waterproof project is completed, seal the door and the drain, fill the bathroom floor with water to reach a certain liquid level, and mark it. If the liquid level does not drop significantly within 24 hours, especially the roof of the downstairs house does not occur Leakage, waterproof to do qualified. For the acceptance of the waterproof construction of light walls, a water spray test should be adopted, that is, the water pipe is sprayed continuously from top to bottom on the wall with waterproof coating for 3 minutes, and after 4 hours, observe whether the other side of the wall is There will be infiltration phenomenon. If there is no infiltration phenomenon, it can be considered that the wall waterproof construction is qualified.
Note 6: Non-slip floor tiles are the best choice. There is often water in the bathroom, and it is easy to slip when walking on it, so it is best to use non-slip floor tiles with raised patterns. This kind of floor tiles not only has good waterproof performance, but also will not be too slippery even in the case of water . At the same time, the ground should be slightly inclined to the floor drain to facilitate flushing and cleaning.
[Specific steps of bathroom waterproof construction]
1. First, do a good job of waterproofing the bathroom floor. First of all, do leveling. If you want to replace the floor tiles in the bathroom, after the original floor tiles are chiseled, you must use cement mortar to level the ground, and then do waterproofing. This can prevent the waterproof coating from leaking due to uneven thickness.
2. The seams should be brushed in place. The joints between the bathroom wall and the ground and the joints between the upper and lower water pipes and the ground are the most prone to problems. During the construction, you must urge the workers to deal with these corners, so the waterproof coating must be applied in place.
3. Wall treatment is also very important. In the general bathroom waterproofing treatment, about 30 cm of waterproof paint should be applied on the wall to prevent the accumulated water from seeping through the wall. However, if the wall of the bathroom is a non-load-bearing light-body wall, the entire wall must be covered with waterproof paint. If your home uses a two-panel shower screen, the two connected walls should also be painted. If you use a bathtub in your home, the height of the waterproof coating on the wall adjacent to the bathtub should be higher than the upper edge of the bathtub.
4. Waterproof test must be done. After the construction of the toilet is completed, all the drains in the toilet are blocked, and a 25 cm high “can” is built at the door, and then 20 cm high water is poured into the toilet. After 24 hours, check the surrounding walls and floors for leaks. This 24-hour waterproof test is the key to ensure the quality of bathroom waterproofing, you must do it.
5. Keep the water unobstructed. All sewer pipes in the bathroom, including floor drains and sanitary ware sewer pipes, must be kept unobstructed. Only in this way can the tragedy of “flooding the Seventh Army” be fundamentally avoided.