In our home life, bathroom waterproofing is a very important link. Everyone knows that waterproof paint can be used for waterproofing, so the question arises again, how to apply waterproof paint in the bathroom? Today we will give you a brief introduction to how to apply waterproof paint in the bathroom.
Two types of coatings for bathroom waterproofing
Nowadays, the materials used for waterproofing are generally paints, and asphalt-based waterproofing paints are basically not used. The following are two commonly used coatings for bathroom waterproofing.
(1) Synthetic polymer polyurethane waterproof coating (polyester cloth, glass fiber cloth, etc. are required for corners, etc.)
(2) Polymer-modified asphalt-based SBS waterproof coating (requires carcass reinforcement polyester cloth, glass fiber cloth, etc.).
Toilet brush waterproof coating process
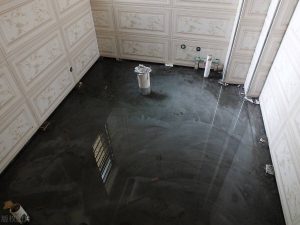
1. Before construction, make sure that the construction site is clean and dry. The waterproof coating should be fully applied without omission. It should be firmly combined with the base layer without cracks, bubbles or shedding. The painting height is consistent, and the thickness must meet the product requirements. Then start to brush the waterproof paint for the first time, requiring more than 1.5 mm, which cannot be determined by the number of times. Brush the tube root and wall corner reinforcing layer first, and then brush and scrape a large area after 4 hours of surface drying at room temperature. There must be no missing scraping or bubbling.
2. Brush the waterproof paint for the second time. Note that there needs to be a certain time interval between the first and second coats of waterproof paint. The second coat can only be done after the first coat of paint is completely dry. The specific time depends on the paint. If the interval is too short, the waterproof effect will be greatly reduced. First paint the facade and then the plane, and the direction of the next painting is perpendicular to the previous one. When the coating film is semi-cured in the last pass, the coarse sand is thrown to facilitate the combination with cement mortar in the future. The ground waterproof layer should be painted 300 meters away from the bathroom door. The waterproof layer of the waterproof ground should be 200 above the ground, and the waterproof layer of the bathroom wall with a shower should be 1800 above the ground.
3. Lay a protective layer. In order to prevent the subsequent construction from damaging the waterproof layer, a protective layer should be laid on the surface of the waterproof coating. The protective layer should completely cover the waterproof layer without any omissions, and it should be firmly combined with the base layer without cracks, bubbles or shedding.
4. Closed water test. During the closed water test, the water at the highest point on the ground should not be less than 2 cm, and it should be stored for at least 24 hours, and it can only be considered qualified after no leakage is observed. If there is leakage, it needs to be redone, and it must not be neglected.
Matters needing attention in bathroom brush waterproof coating
1. Pay attention to the water pipes carefully, you can brush it several times, and even pour the leftovers directly around the pipes at the end. This kind of place is prone to water seepage due to uneven painting.
2. The wall should be brushed up to 30 centimeters around, and the shower area should be 1.8 meters wide, and the width should be limited to the shower area.
3. For the 24-hour closed water test, you must go downstairs to see if there is any water leakage. If not, stick the floor tiles.

