Detailed installation steps for hanging air conditioners
A, the installation of the indoor unit
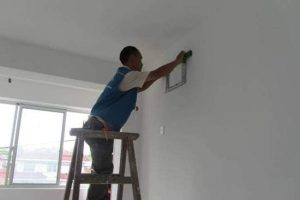
1、After choosing the installation location, firm installation plate
① will be the head of the installation plate removed, the installation plate on the pre-selected installation location, at this time should be kept level and leave enough with the ceiling and left and right wall dimensions, to determine the location of the solid wall plate hole. ② with Ф6 drill bit hammer to play a good solid hole after inserting plastic expansion tube, with self-tapping screws will be installed firmly on the wall. Firm holes should not be less than 4-6, and use the level to determine the level of the mounting plate.
2、Punching holes through the wall
According to the mechanical model to choose the drill bit, use electric hammer or water drill to punch holes through the wall. When punching holes should only avoid the wall inside and outside the wire or foreign body and too hard wall, the inside of the hole should be higher than the outside 0.5-1cm in order to drain, from the side of the indoor unit out of the pipe over the wall hole should be slightly lower than the lower side of the indoor unit, rhinestone hit when the application of plastic sheeting on the wall or accept other ways to prevent water flow in the wall, with electric hammer punching holes should be accepted dust-free installation device.
3、Adjacent to the adjacent pipe
①Put the indoor unit on a softer mat to prevent scratching. ②Adjust the output input pipe bias or position according to the position, determine whether it is left out of the pipe, right out of the pipe, left back out of the pipe or right back out of the pipe. ③ the indoor unit output input pipe insulation sleeve tear 10-15cm, facilitate and adjacent to the pipe adjacent to the first adjacent to the low-pressure pipe, and then connected to the high-pressure pipe, the cone vertical top to the flare, the adjacent nut screwed to the bottom of the bolt by hand, and then two wrenches firmly tighten.
4、Wrapping adjacent to the pipeline
①Wrap the power line, signal line on the upper side, adjacent to the pipe in the center, the water pipe in the lower side of the order. ② Do not pull the serpentine tube when wrapping. ③ determine the location of the water outlet adjacent to the drainage pipe, when the drainage pipe is not long enough, need to lengthen the drainage pipe, should pay attention to the drainage pipe lengthening department should be wrapped in its indoor department with pipe guards; drainage pipe interface to be sealed with universal adhesive, water pipe in any position shall not have coiled; stretch pipe, available vinyl tape firm 5-6 parts. ④ Wrapping should avoid even the pipe discussion for leak detection.
5、Hanging indoor unit
The wrapped pipe and adjacent line through the wall hole, and prevent the flare damage and mud into the connected pipe, until you can hang a good indoor machine, to ensure that the indoor machine snap into the slot, shaking by hand, up, down, left, right can not shake, with a level meter to measure the level of the internal machine.
Second, the outdoor unit installation
(1) firm installation bracket: installation bracket with expansion bolts or long bolts firm, thin walls or strength is not enough when the application of long bolts firm, bolts to add anti-loose pad, otherwise may cause loosening or falling, firm bolts should be more than 6, diameter shall not be less than 10mm, firm can suffer 4 times the weight of people plus machinery, bracket should be kept level.
(2) the outdoor unit with a diameter of 10mm bolts firmly in the bracket, the bolt should be worn from the top down, and add anti-loose pad, check whether the outdoor unit is level. If the outdoor unit is installed in a place higher than the indoor unit, it should be installed in the way shown below, and the rugged difference should be less than 5 meters.
(3) Even power and signal lines: remove the electrical box cover of the outdoor unit, and adjoining good wires according to the number paired in the junction box of the indoor unit and the outdoor unit.
Connect the pipe
(1) Check if there is any dirt in the flapper, put the excess sector on the place that does not affect the appearance according to the need, aim the flapper vertically at the conical mouth, screw the adjacent nut to the bottom by hand, and tighten it with a torque wrench.
(2) Accept the vacuum pump or bring your own refrigerant cylinder to evacuate. You can also open the regulator rod 1/2-1/4 to lift the fluorine port thimble to evacuate for 10-15 seconds, as usual, when you can sense the coolness of the exhaust by hand, and then all open the rugged pressure valve rod.
(3) Use soapy water or leak detector to check the leakage of each interface, fluorine filling port and rugged pressure valve stem, and stay at each place for not less than 3 minutes, and pay attention to leak detection in summer under shutdown condition and in winter under heating condition to ensure that there is no leakage and then wrap each adjoining place with insulation sleeve to ensure that each department of copper pipe is not in contact with air to prevent future leakage.
Finishing
(1) will be adjacent to the pipe finishing into horizontal and vertical, bend radius is greater than 10cm, bend the adjacent pipe bending flat.
(2) will be adjacent to the pipe reshaping, and according to the requirements of the firm, preferably every 1.5 meters with a pipe card firm, to prevent noise in mechanical things.
(3) Install the wall guard ring with sealing mud blocking over the wall hole to prevent air foreign matter from entering the room.
Installation of remote control bracket
According to the user’s requirements, install the remote control bracket for them. And pay attention to the installation location should only avoid direct sunlight and around the place where there are heat sources (such as taking temperature, stove, etc.).