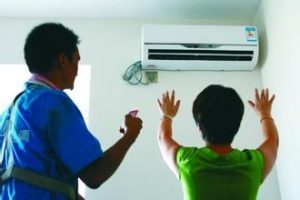
1. Installation of indoor unit
1. After choosing the installation location, install the board firmly
①Remove the installation plate at the back of the indoor unit, and place the installation plate on the pre-selected installation position. At this time, it should be kept level and the size of the ceiling and the left and right walls should be kept, and the position of the solid wall plate hole should be determined. ②Drill a solid hole with an electric hammer with a Ф6 drill bit, insert the plastic expansion tube, and fix the mounting plate on the wall with self-tapping screws. The number of fixed holes shall not be less than 4-6, and a level shall be used to determine the level of the mounting plate.
2. Punch through the wall hole
Select the drill bit according to the machine model, and use an electric hammer or a water drill to drill through the wall hole. When punching holes, try to avoid wires or foreign objects inside and outside the wall and hard walls. The inner side of the hole should be 0.5-1cm higher than the outer side for drainage. The wall hole from the side of the indoor unit should be slightly lower than the lower side of the indoor unit. When drilling, use plastic cloth to stick on the wall or use other methods to prevent water from flowing on the wall. When drilling with an electric hammer, use a dust-free installation.
3. Adjacent to the adjacent pipe
①Place the indoor unit on a soft mat to prevent scratches. ②Adjust the direction or position of the output and input pipes according to the position, and determine whether it is the left outlet pipe, the right outlet pipe, the left back outlet pipe or the right back outlet pipe. ③Tear off the insulation casing of the output and input pipes of the indoor unit by 10-15cm to facilitate the connection with the adjacent pipes. Screw down to the bottom of the bolt and tighten firmly with two wrenches.
4. Bandage adjacent pipelines
①Wrap up the power line and signal line on the upper side, the adjacent pipe in the middle, and the water pipe on the lower side. ② Do not pull the serpentine tube hard when bandaging. ③ Make sure that the water outlet is adjacent to the drain pipe. When the drain pipe is not long enough and the drain pipe needs to be lengthened, attention should be paid to the lengthened part of the drain pipe and the indoor part should be covered with a protective tube; the drain pipe interface should be sealed with universal glue, and the water pipe should not There are twists and turns; when stretching the pipeline, use vinyl tape to fix 5-6 parts. ④ When bandaging, avoid connecting pipe joints to prepare for leak detection.
5. Suspended indoor unit
Pass the wrapped pipe and adjacent wire through the hole through the wall, and prevent the bell mouth from being damaged and sand from entering the connecting pipe until the indoor unit can be connected to ensure that the indoor unit is snapped into the slot. Do not shake down, left, and right, and use a spirit level to measure whether the internal unit is level.
2. Outdoor unit installation
(1) Firm mounting bracket: The mounting bracket is fixed with expansion bolts or long bolts. When the wall is thin or the strength is not enough, long bolts should be used for firmness. The bolts should be equipped with anti-loosening pads, otherwise it may cause loosening or falling. More than 6 firm bolts should be used. The diameter should not be less than 10mm, and it can withstand 4 times the weight of people plus machinery after being fixed, and the bracket should be kept horizontal.
(2) Fix the outdoor unit on the bracket with bolts with a diameter of 10mm. The bolts should be passed from top to bottom, and anti-loosening pads should be added to check whether the outdoor unit is level. If the outdoor unit is installed higher than the indoor unit, it should be installed as shown in the figure below, and the height difference should be less than 5 meters.
(3) Connect the power line and signal line: remove the electrical box cover of the outdoor unit, and connect the wires according to the paired numbers in the junction box of the indoor unit and the junction box of the outdoor unit.
Connected tube
(1) Check if there is dirt on the bell mouth, and put the excess department certificates in a place where it will not affect the appearance. The bell mouth is vertically aligned with the tapered mouth, and the adjacent nut is screwed to the bottom by hand, and then tightened with a torque wrench.
(2) Use a vacuum pump or the built-in refrigerant cylinder to empty. You can also open the pressure regulating valve stem 1/2-1/4 to lift the fluoride port thimble to empty for 10-15 seconds. Usually, you can feel that the exhaust gas is cold and stop emptying by hand, and then fully open up and down to press the valve stem.
(3) Use soapy water or a leak detector to check for leaks at each interface, fluorine filling port, and bumpy pressure valve stem. During the leak check, stay at each place for no less than 3 minutes, and pay attention to leak checks in the shutdown state in summer, and check for leaks in winter. Check for leaks in the heating state, and after ensuring that there is no leakage, wrap the adjacent parts with insulation sleeves to ensure that all parts of the copper pipe are not in contact with the air to prevent future water leakage.
tidy
(1) Arrange the adjacent pipes horizontally and vertically, and the radius of the bend should be greater than 10cm as much as possible. When bending the pipes, the adjacent pipes must not be bent and flattened.
(2) Reshape the adjacent pipe and fix it as required. It is best to fix it with pipe clips every 1.5 meters to prevent noise during mechanical work.
3. Install the wall retainer and use sealing mud to block the wall hole to prevent air foreign matter from entering the room.
Install the remote control bracket
According to the user’s requirements, install the remote control bracket for it. And pay attention to the installation location should try to avoid direct sunlight and places with heat sources around