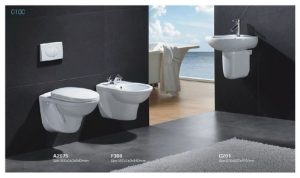
The wall-mounted toilet is slowly becoming popular because the sewage outlet is on the wall, which saves space and is easy to move. However, we still need to pay more attention when installing the wall-mounted toilet. Below, I will introduce the installation steps of the wall-mounted toilet and the precautions for the installation of the wall-mounted toilet.
Wall row toilet installation steps
Step 1: Adjust the height of the water tank
Side press water tank: According to the thickness of the decorative layer Xcm, from the horizontal line in the white box on the upper part of the bracket to the bottom of the bracket, the adjustable foot is 100cm+Xcm.
Top press water tank: according to the thickness of the decorative layer Xcm, the adjustable foot bottom is 82cm+Xcm from the top of the bracket to the bracket. The adjustable feet of the bracket are only allowed to be adjusted to a maximum of 20cm if there is no special lengthening.
Step Two: Fasten the Screws
The installation of the water tank bracket is mainly fixed by 4 screws, two on the upper part of the bracket and two on the supporting feet; at the same time, all screws on the water tank bracket must be fastened. When installing, ensure that the surface of the water tank bracket is horizontal and the vertical surface is vertical.
Step 3: Water supply pipe connection
The water inlet of the water tank shall be connected with the indoor water supply pipe (hard pipe) and the angle valve of the water inlet of the water tank. It is strictly forbidden to install the supporting angle valve in the water tank outside the tank, so as not to cause the angle valve to be unable to be opened and closed during cleaning and maintenance of the water tank. It is strictly forbidden to use a hose to connect the water supply pipe and the angle valve of the water tank. The pressure of the pipe and the quality of the hose may cause leakage. In case of leakage, the false wall must be destroyed to repair.
Step Four: Drain Pipe Installation
If the concealed water tank is installed in the original pit position, the short pipe connecting the water tank and the drainage pipe must be larger than φ90 to prevent blockage.
Step 5: Protective device installation
All protective devices should be installed before the false wall is made and the decorative layer is installed. Install the screw protection hose, divide it into two parts, and put them on the front and rear ends of the screw respectively, so as to avoid blocking the screw hole when building a false wall or installing a decorative layer.
Step 6: False Wall Making
1. Light steel keel + moisture-proof gypsum board
The surface of the light steel keel and the water tank support must be flat, and the water tank protection frame, flushing pipe, drain pipe, and screw position are reserved on the gypsum board, and the gypsum board surface must be close to the surface of the support and fixed. The water tank bracket is filled with bricks or concrete below the toilet elbow to avoid the cracking of the decorative material when the toilet is in use because the gypsum board is not tightly attached to the bracket.
2. Gray brick + wire mesh
Use bricks on the edge and gap of the water tank bracket to keep it flat with the surface of the bracket. Use a wire mesh slightly larger than the bracket to seal the water tank bracket as a whole, and fix the wire mesh to the brick wall. If necessary, two layers of wire mesh can be sealed.
3. Red brick
Seal red bricks on the edge and gap of the water tank bracket, build a red brick wall about 50mm in front of the water tank, and reserve the positions of the water tank protection frame, flushing pipe, drain pipe, and screw. The minimum thickness of red brick is about 50mm.
Step Seven: Hanging Toilet Installation
The false wall has been decorated and the tiles have been installed. Stick the soundproof pad on the decorative wall. Measure and cut the pipe, then install the toilet according to the screw position.
Precautions for wall-mounted toilet installation
1. Wall pit spacing:
If you install an in-wall toilet, you must first measure the height from the center of the sewage outlet to the ground, which is the pit distance of the wall row. The thickness of the tile should also be taken into account when measuring, and the measurement distance minus the thickness of the tile is about 1-2 cm.
2. Sewage discharge method:
The sewage outlet of the wall-mounted toilet is on the wall, also called side discharge. Some of the modern new residential areas use this kind of drainage, which can be installed with water tanks and wall-mounted toilets.
3. Water selection:
Because the water tank of the wall-mounted toilet is hidden in the wall. Water tank materials, processes and internal water parts are even more important. Whether it is hdpe (high-density polyethylene, which can be simply understood as advanced resin), or whether it is one-time blow molding, will directly determine the service life of the water tank. Water tanks with poor workmanship will easily leak, and the water inlet valve and drain valve also need high-quality verification, otherwise the hidden water tank will become a hidden trouble. When choosing a hidden water tank, you must consider whether the manufacturer is professional and has been verified by the public.

