Many older houses now have clunky old toilets, which can be extended by replacing them with new ones. Now the new toilet seat can also be used in the old toilet, especially the oval toilet base, but we should pay attention to the size and shape of the replacement, so as not to buy a trip. So how do you remove the old toilet cover?
First, the demolition and installation of the old toilet cover
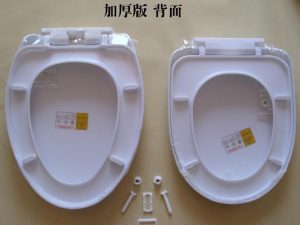
The old toilet is generally not completely surrounded, you can see if the side is not a toilet lid bolt, you can loosen the screw and remove the toilet lid by hand, if the side is not you can see the toilet behind the following holes and screws. If the screw rust, do not forcibly remove, so as not to force too much damage to the toilet, can be on the toilet surface with hacksaw saw off the screw, during the protection of enamel surface. When replacing, pay attention to choose the right size screws, pay attention to the width and length of the toilet lid, install the toilet rear or side screws in the opposite direction and adjust the seat of the toilet lid.
Two, how to install the old toilet
1. Determine the installation position and drill holes in the ground. Align the drain on the floor with the drain on the bottom of the toilet, mark the position of the fixing hole on the bottom corner of the toilet based on the external dimensions of the toilet base, and drill the hole using a hammer drill. The depth of the hole is about 5 cm.
2. Install the toilet base. Knock the steel expansion bolt into the drill hole in the ground, insert the bottom corner of the toilet into the expansion bolt, then tighten the nut to hold the toilet in place. The toilet drain and the preset drain line on the ground should be tightly connected and sealed.
3. Install the water tank according to the installation height of the water tank and the position of the hole in the rear wall of the water tank (the all-in-one toilet can be omitted), fix the drill hole on the wall and punch in the steel expansion bolt, then place the water tank in position so that the rear expansion bolt is inserted into the hole in the wall, add a 3mm thick nylon washer, and then put on the nut and tighten it.
4. Install a connection pipe (copper pipe or plastic pipe) between the water tank and the toilet base, and a connection pipe (stainless steel corrugated pipe) between the water inlet pipe and the bottom of the water tank. Install an Angle valve (water inlet control valve) at the connection of the inlet pipe.
Iii. Precautions for toilet installation
1. Check the levelness of the floor where the toilet is to be installed. If tilting is found, it can only be installed after adjusting it to a horizontal position; Otherwise, reinstall it.
2. Check the sewage pipe of the toilet before installation to remove sundries, waste paper and other sundries in the sewage pipe;
3. Keep the drain pipe 2 to 5 mm above the ground;
4. After commissioning and installing the water tank fittings, connect the tap water, pour the water into the water tank, and then observe whether the water tank or water inlet hose leaks;
5. The water pressure of tap water is generally stable. Once filled, test the toilet to see how well it drains and if it flushes securely. If the whirlpool is very fast and rushing out, it means the water is clear. Otherwise, check whether there is a blockage.