地砖是每个家庭装修中必不可少的建材,地砖铺设的好坏会直接影响到家庭装修的质量。现在很多家庭都是请师傅来铺地砖,但是有时候还是需要自己动手。接下来就跟随我们了解一下地砖铺设过程的日常简单方法,希望对大家有所帮助。
第一步,地砖浸泡
先将地砖清洗干净,浸泡2小时以上。浸泡是为了让地砖充分吸收足够的水分,以免铺贴完成后吸收材料中的水分,导致粘结剂缺水,影响粘结牢固度,造成空鼓、脱落。地砖充分浸入水中后,开始铺设前,需将其从水中取出,擦去表面水分,方可进行铺设。
第二步、设置辅助线
开始铺贴前在墙面找平层上挂垂直线,用来确定地砖的墙面尺寸线。然后定出水平线,这样就可以保证地砖保持水平和垂直,表面平整。
第三步,设置支撑板
粘贴地砖时,必须以水平线为准,并在地砖上垫上能起支撑作用的木板,防止地砖在未达到粘结强度时发生位移或掉落。
第四步,按顺序铺贴
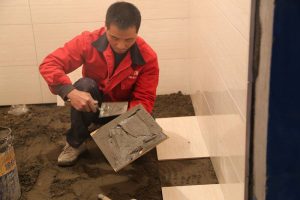
地砖的铺贴一般从门窗(或阳台)开始,从上到下,从左到右。具体铺贴方法是:先将找平层湿润,用铲子将砂浆(或其他胶粘剂)抹在瓷砖背面,再将地砖粘贴在墙面上,然后用铲柄或橡胶锤轻敲地砖,使砂浆充满墙面与地砖之间的空隙。
注意口子要与水平线对齐,若不平整,可在地砖下垫小木块调整。贴完线后要用尺子水平,找平。将高出的部分用锤子敲平,再将凹陷的部分填平,确保齐平。黏合材料不宜过厚或过薄,过厚不易铺开,过薄不易黏住。
第五步、清洁、保养
地砖表面的污渍和灰尘需要及时清理,下面介绍一些清洁保养方法。在表面污染严重,特别是一些难以去除的污渍可以使用10%浓度的稀盐酸溶液擦拭。如果使用稀盐酸清洗,一定要用流动水冲洗一遍。地砖清洗完成后,可以在表面喷洒一层薄薄的比利佐尔光亮剂,再用软布擦拭一遍,保持地砖表面光亮,不易被污染。